REFRESH APPS
This button will refresh your apps list after you add or remove applications.
ADD APPS
This button will allow you to add Android applications to your account. There are
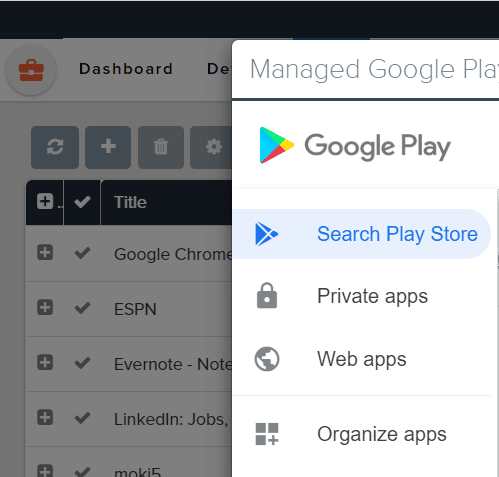
three app options available in Android Enterprise. These options are found by
hovering over the icons to the right of the “Managed Google Play Applications”
window. Here are the details for each option:
● Search Play Store: This will allow you to search for applications published to
the Google Play Store.
- Select the “Search Play Store” option on the left-hand side of the Google Play window.
- Then, type the name of the desired application in the search bar, press enter on your keyboard or click the blue search button.
- Once you locate the application you’d wish to use, click the app to open it, then click the green “Select” button. You should see a blue confirmation window in the top right-hand corner of the screen that says“ Success. Selected app request sent.” You can continue to search and add
additional applications. - Once you are finished adding applications, you can close the window by selecting the X in the top right-hand corner or by clicking outside of the window. You should now see your selected applications listed in on the apps list. You may need to click the refresh button to update your
app list.

- Web Apps: This option will allow you to display an application that opens directly to a website or a web application.
- To do this, select the “Web Apps” option from the left-hand side of the Google Play window.
- Then select the + icon on the bottom right-hand side of the window. Note: you might need to scroll down to see it.
- Configure your web app settings, including a custom icon and title. Lastly, click the blue “Create” button. Note: you might need to scroll to the right to see it.
- After a few minutes, your newly created web app will appear in the Web App window.
- Organize Apps: This option will allow you to create a collection of apps that you can use on your devices. You can organize the applications by folders and arrange the order of the applications.
DELETE APP
This button will allow you to remove unwanted applications from your apps list.
Simply select the application that you want to remove and click the trash can icon.
Some applications, like email, web browser, phone, messaging, etc. allow you to
customize in-app settings. These settings can be configured by selecting the
application in the apps list and then by clicking the “Add Configuration” button.
Once you have configured your applications, select “Save” at the bottom of the
page.
APP REPORT
Download the App Report using the download icon in the App Report column.

- This report will include all devices that currently have the chosen app installed
- This report will include the following data:
- Device Nickname
- Device ID
- Device Serial Number
- Device Brand
- Device Model
- Device Android Version
- Device IEME (when applicable)
- Device MEID (when applicable)
- Device WiFi Mac Address
- Device Applied Policy Name
- Device Applied Policy Version
- App Display Name
- App Version Name
- App Version Code
BULK APP UPDATE MODE
Perform bulk updates of the Policy App Update Mode setting per application.
- Update the App Update Mode under the Policy=>Application Control=>App Update Mode, in bulk per application
- Under the Apps tab
- Select the desired application
- Bulk App Update Mode
- Select the desired Policies to change the App
- Update Mode setting
- Select the desired App Update Mode
- Click Update to confirm and execute the change

