Managing Your App
Now that you are using MokiTouch 2 or another app with the MokiManageSDK in it you have access to the best app management tools on the market. Here we’ll teach you how to use them to Manage your app. We’ll discuss MDM controls later.
Step 1: Setup Proactive Alerts
Let’s be honest, after these devices are in the field you are going to move onto your next project. Because of that we will proactively reach out and notify you when important things happen, like the device has become unplugged (Power Status alert) or the app isn’t open or has lost WiFi (Device Connectivity alert). Not every alert is important to every person. For example, if you have the MokiManageSDK embedded into your consumer app you probably don’t care about being alerted when the app has been closed or can’t be reached. Just follow these steps to initiate and confirm what you want to be notified about.
- In Manager click Change App in the top left and select the app you want to manage
- Click the Alerts tab in the top navigation
- Input an email or phone number (hit enter after entering for it to save)
- Choose the Standard Alerts and Custom App Alerts (MokiManageSDK embedded apps only)
- Hit Save
- If you want different alerts for different subsets of devices you’ll need to tag your devices and create alert groups for these. More info »
Step 2: Supporting Your App
There will come a time when someone calls you saying that there is an issue with one of your devices or when you will want to get a status update on a particular device. The Devices tab is the place to get this information. We won’t be able to tell you how to solve every problem you might encounter but by understanding what is available to you, hopefully you’ll be better equipped to do so. We’ll review the different sections of the screen shown in the image below.
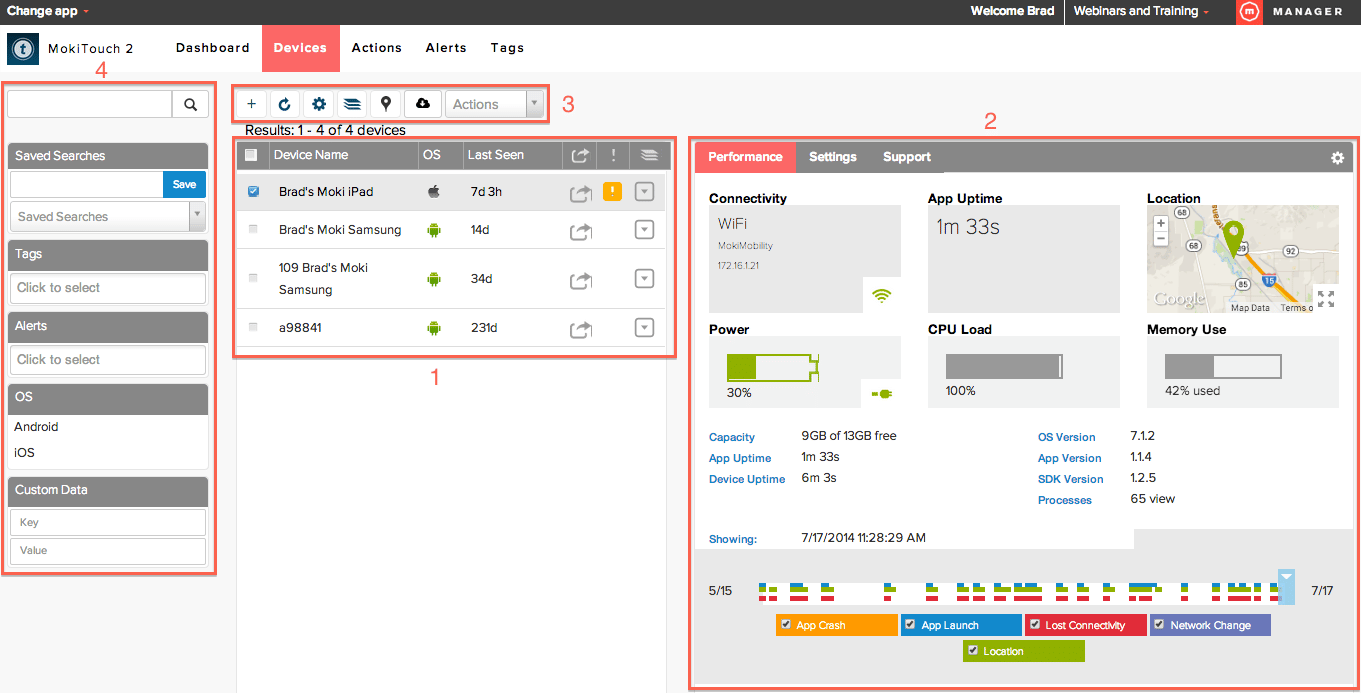

Section 1 – Device List
What you can do in the device list:
- See all your iOS and Android devices in one list that is sortable and filterable
- Scroll down to load more devices as only the 100 most recently seen devices are shown
- Change the device list fields by clicking on the gear icon above the device list

- Jump-to the device in another app or MDM by clicking the Jump-to icon

- See which devices have triggered your configured alerts (red or yellow box with an exclamation point)
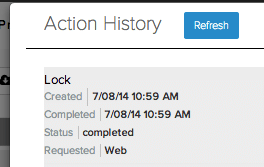
- View the current status of any actions send to a device by clicking on the Action History icon.


Section 2 – App Information
The box on the right gives you access to the performance data of the app, settings management of the app and the support features like screenshots and device screensharing sessions. We’ll break down each tab
Performance
-
- Shows the last data received from the app such as it’s connectivity status, how long the app has been running, the version of the app the device is running and it’s OS

- Shows the last data received from the app such as it’s connectivity status, how long the app has been running, the version of the app the device is running and it’s OS

- Historical running timeline (bottom section). This will show key indicators of your apps performance such as any changes in connectivity, when the app was launched, when it crashed (including a stacktrace log) and any network changes the device has made. When you click in the timeline the information above will change as well.


Settings
-
- Edit the app’s settings

- Edit the app’s settings

- Create, edit and delete Saved Settings templates


Support
-
- Change a device’s nickname (important if you are on Android and want to customize the name so it isn’t the last 6 of the MAC address). Click in the name field and edit, hitting Enter when you’re done

- Change a device’s nickname (important if you are on Android and want to customize the name so it isn’t the last 6 of the MAC address). Click in the name field and edit, hitting Enter when you’re done

-
- Add a tag to a device
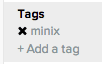
- Add a tag to a device

-
- Request Follow Me Support (Device Screensharing Session). This sends a request to the device to share the screen When they accept their screen will be displayed for you. You can also view and share previous sessions

- Request Follow Me Support (Device Screensharing Session). This sends a request to the device to share the screen When they accept their screen will be displayed for you. You can also view and share previous sessions

-
- View screenshots. Screenshots requests are made from the Actions list located above the device list. We store the 20 most recent shots. After a screenshot is returned you’ll need to refresh this window for it to give you access

- View screenshots. Screenshots requests are made from the Actions list located above the device list. We store the 20 most recent shots. After a screenshot is returned you’ll need to refresh this window for it to give you access

- See device and network information
Section 3 – Action Bar
The actions bar acts as a shortcut for several different actions. We’ll review what each icon does below.


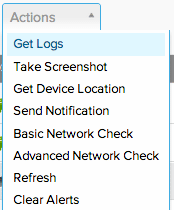
- Actions drop down – This is where you send requests to the device, such as getting screenshots, sending custom notifications (iOS only) and manually pinging the app to see if it is open and responding (Refresh). To use, select a device or devices, click the Actions drop down and select an action. To view screenshots or location information you’ll need to click on the Support tab to the right after it has completed.


Section 4 – Search and Filters
To make it easier to find your devices, use the search and filter section. This works best when you have tagged subsets of devices. It is important to note that all searches use an OR function, which means that any device meeting any of the selected criteria will be displayed. Here are the different search and filter methods and what they return.
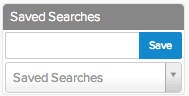
-

- Saved Searches – Saves the current search and filters to be used later. This is cookie based so it only saves it for you on that computer and browser


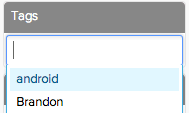
-
- Tags – Select from tags created within the tenant
- Tags – Select from tags created within the tenant

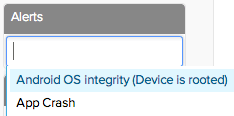
-
- Alerts – Shows all available alerts. Only devices that have triggered an alert (have a red or yellow exclamation point icon next to their device) will be returned
- Alerts – Shows all available alerts. Only devices that have triggered an alert (have a red or yellow exclamation point icon next to their device) will be returned

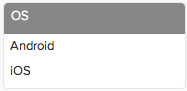
-
- OS – Returns only devices running the OS selected
- OS – Returns only devices running the OS selected

- Custom Data – For those who have implemented the MokiManageSDK they can search their custom data for specific information


Step 3: General Information You Should Know
As mentioned earlier, we won’t be able to give you everything but there are a few more random tidbits that are helpful when you’re in this screen and supporting an app.
Last Seen Time
This is an indicator of whether your app is open on the device and able to receive a ping from the Moki platform. Moki will ping the device every hour, unless changes have been made to the SDK that is in your app. When the app is closed you can’t communicate with it and therefore can’t get screenshots back or logs or send settings to the device. All these actions will be waiting for the device the next time it calls home. If you select a device and send it a Refresh action it will force the device to send back it’s most recent information and the last seen time will update. This is a harmless way of seeing if the device is still open and communicating. Sending a screenshot is also a harmless way of checking this because neither action interfere’s with the user interface in anyway.
Updating Settings and Calling Home
There are two ways that a device will get settings. The first is when the app is opened on the device. It will call Moki and ask for it’s settings. Any changes that have been made within Moki will then be applied. The second is by going to the Settings tab and either applying a template or hitting Edit Device Settings making a change and then hitting Save. As mentioned in the previous section, if the device isn’t currently responding it can’t update so it will have to wait to update until it can call home again.
Refresh the Table or the Browser
When you send an action to the device Manager’s page will not display the information until the table or the page has been refreshed. If you’re looking for the Last Seen time to update you’ll need to do a refresh of one of the two.
Action History Doesn’t Show Everything
Action History shows you the completion or error status of an action you send to a device and can be accessed on a device level or on a group level. The individual level is accessed by clicking the box with the down arrow on it. The group level is accessed by the icon in the Action Bar. Settings will not show up in either Action History. This is because it is not technically an “Action.” Only items in the Actions drop down will show in the Action History.
Templates Need Updating
When you create a template you’ll notice that there is a (v#) at the end of your template name. The “v” stand for version and the version number that it is. This is because each version of an app has a version and those versions need to match each other in order to be applied. Whenever you update the version of your app you’ll also need to update your templates. We have a way for you to easily convert an older version to a newer version. Changing app versions in a template may not convert exactly as you desire because we are taking old settings and trying to force them into new ones. If the new app version added additional fields or took them away we’ll do our best to match them up. What I’m really saying is that after converting them you’ll need to make sure they’re what you want. Changing them is easy, select the device that has the new version of the app, click the Settings tab, click the Apply Saved Settings drop down and select Manage Saved Settings. In the Pop-up window, select the old template you want to convert and hit the Convert to (v#) button. Then go through and modify them to your liking and hit Save.
Also, templates are not usually cross platform compatible so you’ll want to make templates for iOS and Android if you’re using both platforms.
No MDM Commands
From this screen you cannot send new versions of the app to the device, lock the device into Single App mode or remove it from Single App mode. All device controls are done through the MDM portal which is accessed by clicking Change App in the top left of the screen and selecting MDM. Now that you know how to get to MDM, let’s click on that and discuss how to manage your devices with MDM.
