What is Moki Kiosk and when would you use it?
Moki Kiosk is a web browsing app that you can customize and control remotely. Here are some of it’s uses.
- Show one, or many, website videos or images
- Lock users into your experience
- Control website navigation and sessions
- Screensavers when not in use
Step 1 – Installing Moki Kiosk
Moki Kiosk is already in your account so you can include it in your enroll code. Or, you can send it to your device from the Devices tab by selecting your device, clicking the drop-down that says Apps and selecting Moki Kiosk.

Once Moki Kiosk is installed on your device it will show up on the second page of apps with the following icon. You’ll need to open the app so it registers with Moki. Accept all the prompts for Push Notifications, Location, etc.

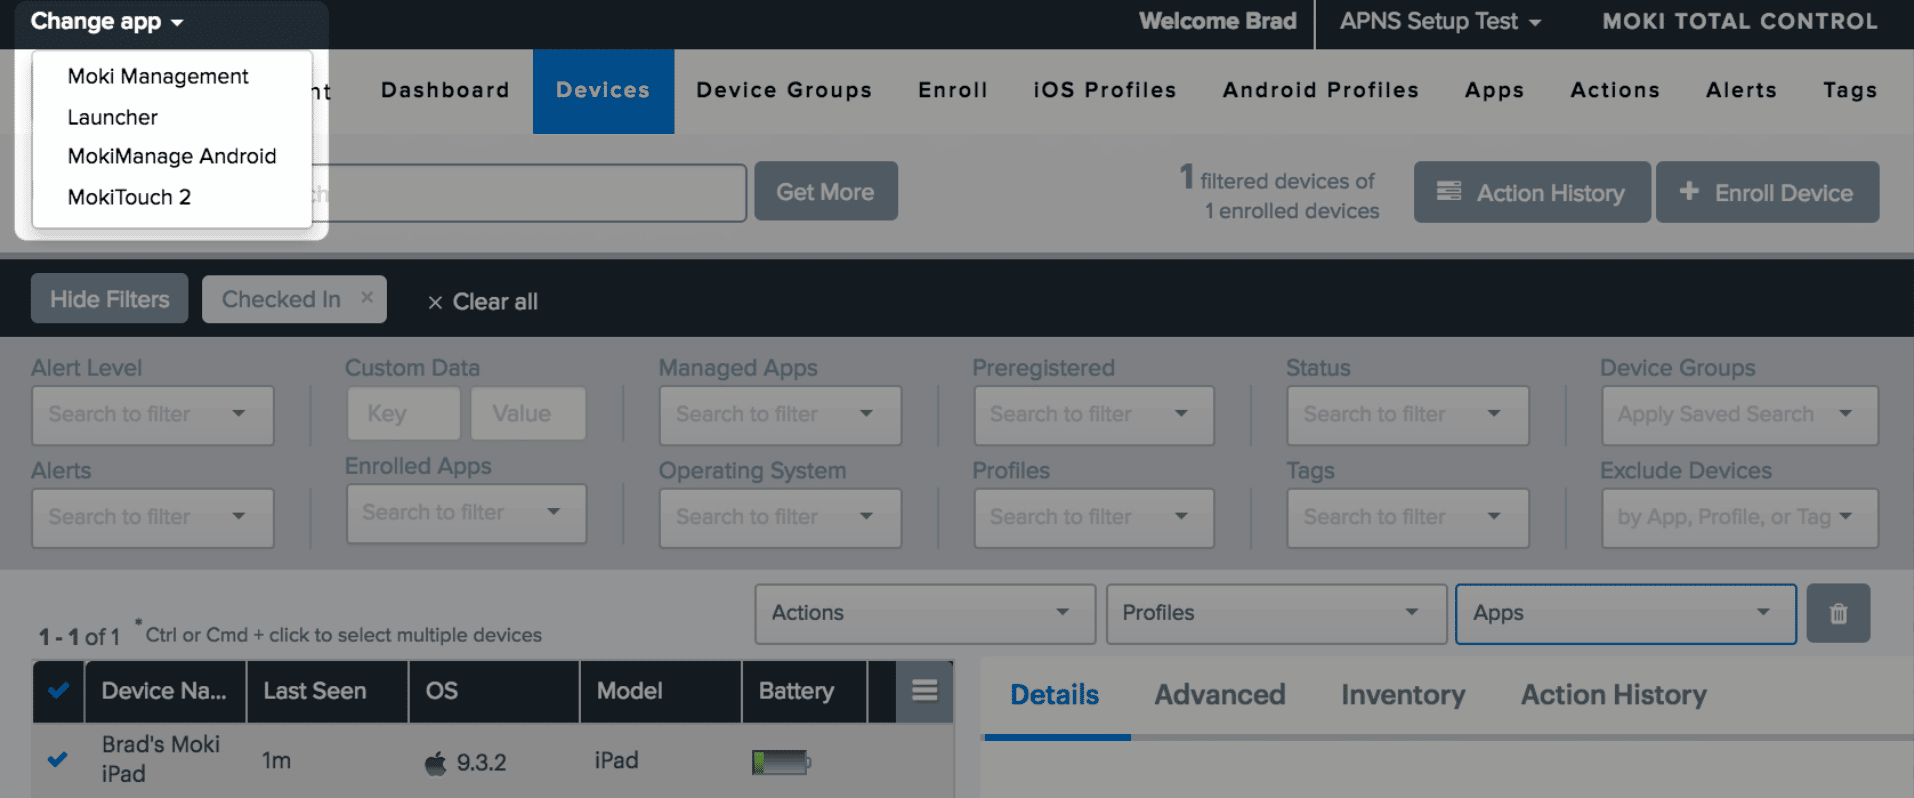
Click Change App in the top left and select Moki Kiosk. Verify your device shows up in the device list.
Step 2 – Moki Kiosk Settings
To start managing settings, click the Settings tab to the right followed by the Edit Device Settings button. When you have finished editing settings, hit the Save button.

Moki Kiosk settings are composed of sections. The first section is General Settings, which controls access to the on-device settings menu, web display settings, and facial recognition analytics. The second section is Content, which controls what you display for your main content and screensaver. Section three is for limiting browsing. Section four is where you set the screensaver content and Section five is where you control the layout features.
We recommend setting an admin password and put a value in the Reset When Idle For settings so that the cache is cleared occasionally. You may also want to turn on the Navigation Buttons if your site isn’t easy to navigate around in.
Moki Kiosk Settings Definitions
General Settings
- Admin Password – Setting an admin password adds a layer of security to the settings screen, being requested when accessing app settings on the device. Settings are accessed by dragging your finger from the top left to the top right and continuing down to the bottom right, essentially tracing the number 7
- Display support code on password prompt – The 6 character support code can be used to identify the device in Moki Total Control’s Search field. Turning this feature on will display the support code on the pop up when attempting to get into Moki Kiosk settings
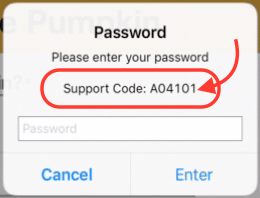
- Display support code on password prompt – The 6 character support code can be used to identify the device in Moki Total Control’s Search field. Turning this feature on will display the support code on the pop up when attempting to get into Moki Kiosk settings
- Device Volume – Controls the volume level of the device (1-15, mute). You’ll need to make sure you have the device’s volume turned on
- User Agent – Controls the display of the device. If your site isn’t displaying the way you want, play with these settings. After changing the User-Agent setting you’ll need to click the End Session button or close the app and reopen it
- Mobile Web View – When a site is designed for a web view instead of Mobile Safari or Desktop
- Mobile Safari – When a website is optimized for mobile it will force the mobile display instead of the full web view
- Desktop Safari – Will display like it does on a computer
- Moki – Used for identifying traffic in your analytics account. The display will be based on the settings of the site
- Tag syncing – This allows you to send metadata associated with a tag through the user’s experience to be read by your website. Set the metadata by going to the Tags tab in Moki Total Control, selecting a tag and entering the metadata on the right. Once this is created, apply the tag to the device by selecting the device in the Devices tab and adding it in the Tags section on the right.

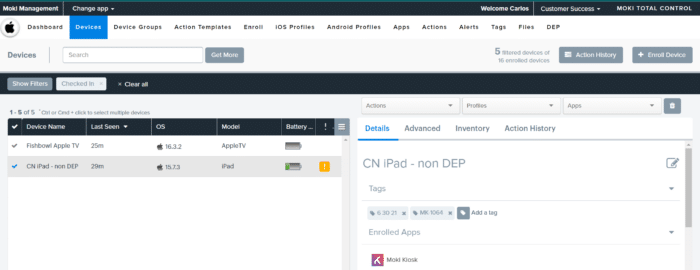
- Advanced analytics – Turn this on and accept the prompt to use the camera in order to utilize the full power of Moki Insights. This allows us to use the camera to capture the number of people who walk by and stop and look at the kiosk.
Content
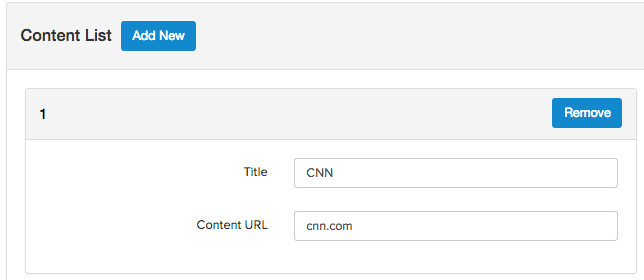
- Content List – These are the URLs you want to show in the kiosks. Paste in web URLs to websites, videos or images. You can drag and drop to change the order they display
- Add New – Used for adding new content items. Each content item needs a title and a URL.
- Title – The title will display as the button label for the content item in kiosk mode
- Content URL – Type http and www only if these must be entered in the address bar on your computer to hit the site
- Advanced Feature:
- Moki Kiosk now supports the ability to use a dynamic URL in the Content URL field for a device-specific or tenant-specific URL
- The following strings will work with this new feature:
- {% raw %} {{deviceName}} {% endraw %}
- {% raw %} {{serialNumber}} {% endraw %}
- {% raw %} {{wifiMac}} {% endraw %}
- {% raw %} {{udid}} {% endraw %}
- {% raw %} {{tenantName}} {% endraw %}
- {% raw %} {{tenantId}} {% endraw %}
- For example, This:


- Advanced Feature:
- Remove – Removes a content item from displaying in kiosk mode
- Refresh Content – Sets whether the Refresh Timer starts after someone touches the device or is always running in the background through a user session. Options are After Touches and Always
- Show Idle Timer Popup – Controls whether a dialogue box pops up when the Refresh timer goes off, asking the user if they want to continue
- Refresh Timer – Sets the time the kiosks sit unused before the Reset destination option kicks in. This function will activate the cookies and cache settings
- Clear cookies on reset – iOS users can disable the Cookie settings, thus maintaining the life of a cookie
- Clear web cache on reset – Can control whether the tablet cache’s the website content or if it attempts to do a full download with each session. Turning this on helps get new website images to the device quicker
- Show loading indicator – Shows a loading indicator while the initial website is loading
- Allow swipe gesture – Allows you to swipe between items in the content list
Web Browsing
- Allowed Domains – Whitelisted domains can be set up here. Allowing access to a domain will allow all subdomains and paths of a domain to be accessible, i.e. (sub.domain.com and domain.com/path). All domains from the Content List are whitelisted automatically and don’t need to be added to this list.
- Add New – Is used for adding new domains in format domain.com.
- Domain – The URL that you want to whitelist. Type http and www only if these must be entered in the address bar on your computer to hit the site
- Remove – Removes domains from allowed domains whitelist
- Disallowed Site Alert – Displays a custom alert message when a disallowed site is accessed. Once activated this pop up can only be removed by the user
- Alert Message – Customizable alert message displayed when a disallowed site is accessed
Screensaver
- Screensaver Content List Setup – The screensaver will display when a kiosk has been idle for a specified amount of time and the On Reset Go To option is set to Screensaver
- Add New – Allows for screensaver content to be added
- Content URL – The URL to a video or image file. Type http, https, and www only if these must be entered in the address bar on your computer to hit the site
- Content Display (in seconds) – Set the time for images to rotate. Video files will rotate automatically after the designated time
- Remove – Removes screensaver content
Layout
- Theme Color – This is the basic color of the kiosk home screen navigation bars. Enter the color as a hex value (#4d4d5d) or select from the color picker next to the # sign
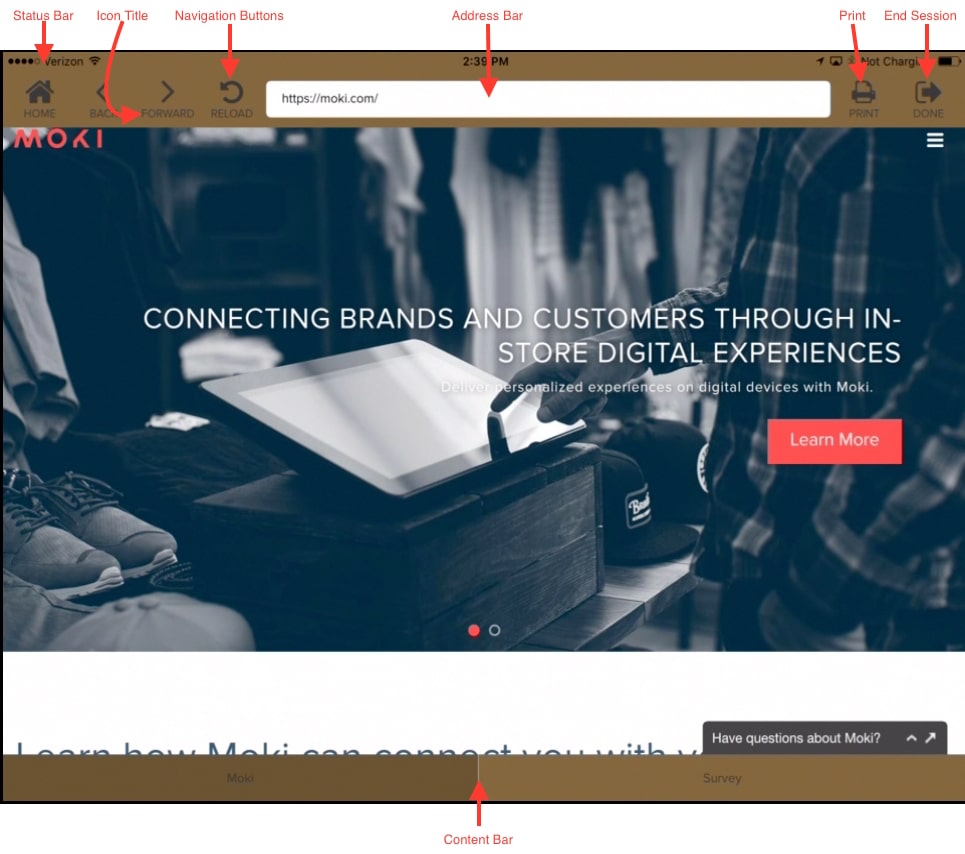
- Icon Style – There are two options, Light, and Dark. This changes the color of the navigation buttons and icon title text to be light or dark in case the change in the theme color doesn’t allow them to be seen clearly
- Show navigation buttons – Shows/hides back, forward, home, and refresh buttons on kiosk home screen (see image below)
- Show print button – Shows/hides print button on kiosk home screen. Print uses iOS AirPrint functionality (see image below)
- Show end session button – When enabled, the End Session button will reset the kiosk back to the kiosk home screen and delete cache, cookies, and browsing history (see image below)
- Show address bar – Shows/hides the browser address bar on the kiosk home screen (see image below)
- Show content bar – Shows the iOS status bar shows/hides print button on kiosk home screen. Print uses iOS AirPrint functionality (see image below)
- Show status bar – Shows the iOS status bar at the top of the page so you can see the network connection type and strength as well as the time
Step 3 – Save your settings for later use
After you have your device set the way you want, follow these steps to save these settings to apply to other devices in the future.
1. With your device still selected, click the drop-down that says Apply Saved Settings and select Manage Saved Settings.

2. Click Create New Template

3. Give the template a name and hit Save

4. The new template will show up in the drop-down that says Apply Saved Settings

