Setting Up and Managing Multiple Accounts Creating Additional Tenants
We advise all those who will be adding multiple accounts to customize their Template account. You will probably create accounts when granting your clients access to manage their own devices or a client will have so many devices that managing them will be easier if they have their own tenant. After we show you how to set this up you should proceed with learning how to Manage your Partner Portal and devices.
Section 1: Setting Up Your Template Account
The idea behind the Partner Portal is that a Partner is going to be creating several accounts, therefore we have built in some shortcuts to make creation and management easier. If you look under the Company Name table header you’ll notice that you have two accounts, one has your account name and the other has your account name followed up with the words (Template).

This template account is used as the basis for new accounts and can be customized to your specifications. There are three elements of the partner template that are copied over to new accounts:
- Tenant Apps
- Apps
- iOS Profiles
The Tenant Apps are changed directly from the Partner Portal. To customize the Apps and iOS profiles you’ll need to login to the account by clicking on the jump-to icon and select Go to Tenant. We’ll show you how to customize all of these elements now.
Step 1 – Setting Available Tenant Apps
To put it succinctly, tenant apps are the apps of which you can control settings from Moki Total Control (MTC). This includes the apps built by Moki as well as any apps with the MokiManage SDK embedded. You’ll want to make sure that each account you setup has access to the apps they will control. If all your clients will have the exact same setup then you’ll only need to do this to your (Template) account. If they will be customized then you can still set up your template account with main defaults and then make changes to the individual accounts as needed. To set the tenant apps:
- Click the (Template) account
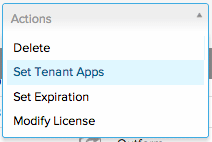
- Click the Actions drop down and select Set Tenant Apps (If no options are available contact support@moki.com to activate the apps. At the time of this article this permissions level was being added to partner admins)
- Scroll through the list and add the apps they will use. MokiMDM is required so don’t uncheck that. Below are some additional options for the different platforms
- iOS
- MokiTouch 2
- Your own app
- Android
- Launcher
- MokiManage Android (Required to manage Android device settings)
- MokiTouch 2
- Your own app
- Scroll to the bottom and click the Assign Tenant Apps button

Step 2 – Adding Apps
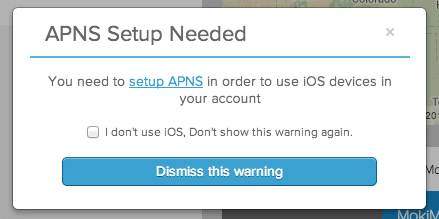
Once you are in the template account you’ll receive the following pop-up box with the title APNS Setup Needed. If they will be using Android make sure to click the checkbox next to I don’t use iOS. Don’t show this warning again before clicking the Dismiss this Warning button. Note: If the client will be using iOS devices they will need to setup APNS according to the instructions in this iOS and APNS Setup article we recommend you send to them, and then let you know when that is complete so you can enroll devices in their account.
- Now that the message is gone click on the Apps tab in the top navigation.

- Now that the message is gone click on the Apps tab in the top navigation.
- Click the + icon on the left

- Click the + icon on the left
- If your app is on the iTunes store you only need the ID number for the app. The quickest way to get this is to Google the app and iTunes in the same search criteria. See the first screenshot below for how to format your search. Click on your app from the search results and then look at the URL and copy the numbers after the ID. Paste the numbers into the iTunes Store ID field and hit Add App


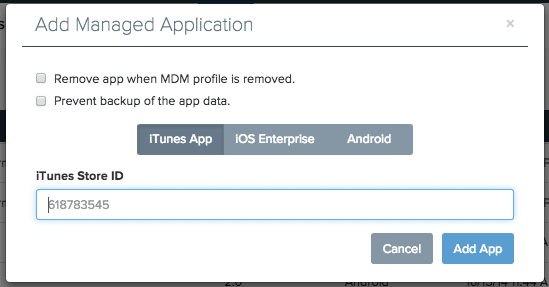
- If your app is on the iTunes store you only need the ID number for the app. The quickest way to get this is to Google the app and iTunes in the same search criteria. See the first screenshot below for how to format your search. Click on your app from the search results and then look at the URL and copy the numbers after the ID. Paste the numbers into the iTunes Store ID field and hit Add App
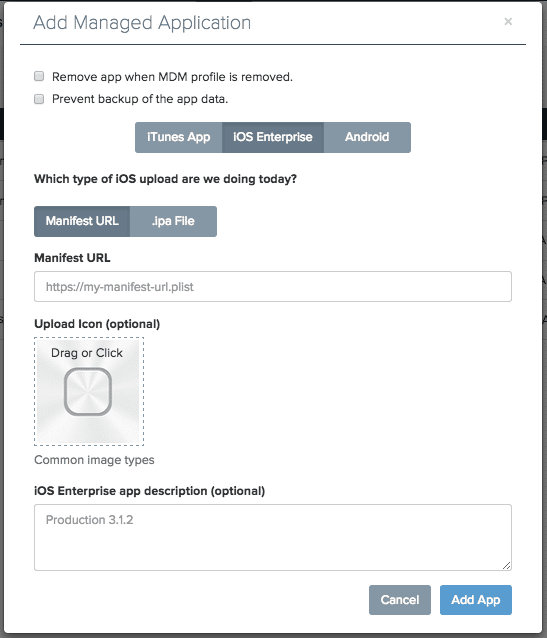
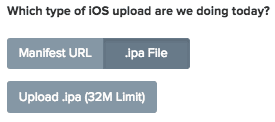
- If you’re using an Enterprise app then you can either upload the .ipa file and host it on our secured server (27 MB max) or you can insert the manifest URL ending in .plist
Step 3 – Creating iOS Profiles
iOS Profiles are specific to iOS devices and control things like WiFi credentials, Single App Mode and device restrictions. They are particular to iOS devices. Android devices restrictions are controlled on the device itself. Read Moki Total Control Tour 5.0 – Profiles Tab to learn more about each policy option. The only profile that you will probably want to create for your (Template) account would be an App Lock profile that locks the device to the app. If your clients will be using MokiTouch 2 then an App Lock profile is already created. Follow the steps below to create your own App Lock profile
- In Moki Management, go to the iOS Profiles tab

- In Moki Management, go to the iOS Profiles tab
- Click the New Profile button
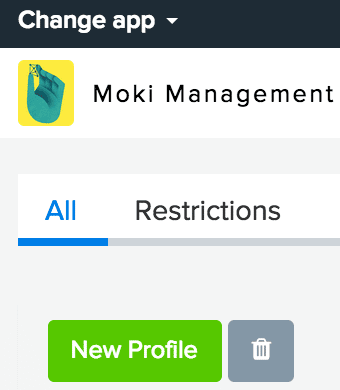
- Click the New Profile button
- Select the profile you want to create, fill in the criteria for your profile and hit the green Save button at the bottom

- Select the profile you want to create, fill in the criteria for your profile and hit the green Save button at the bottom
Section 2: Create the Account
- From the Partner Portal click the

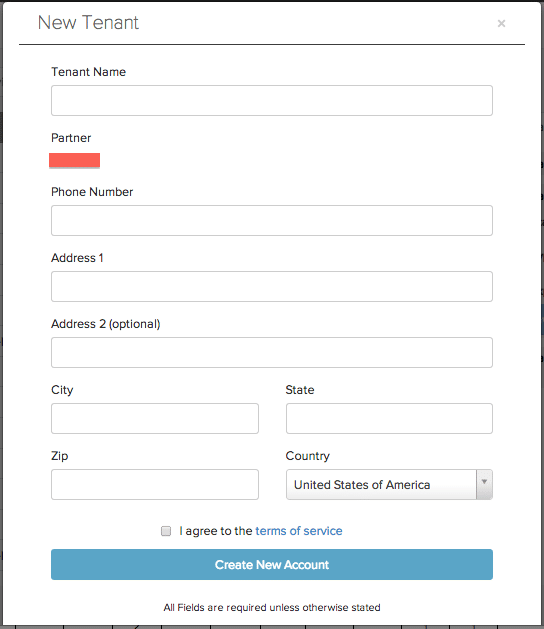
- Fill out the fields with the appropriate company information, agree to the terms and hit the Create New Account button
Section 3: Set Up the Account
Now that you’ve created the account you’ll want to make sure that it has the tenant apps, apps and profiles you want them to have access to. If they will use the same settings as your (Template) account then follow the steps to verify everything is in order
- “X” out of the New Tenant pop-up
- Click on the new tenant in the list
- Click the Actions drop down and select Set Tenant Apps (If no options are available contact support@moki.com to activate the apps. At the time of this article this permissions level was being added to partner admins)
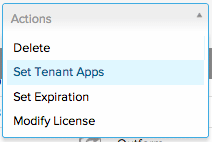
- Make sure the tenant apps they will need access to are checked, scroll down to the bottom and click the Assign Tenant Apps button (Reminder: MokiMDM needs to be checked, and if they are using Android, MokiManage Android needs to be checked)
- Click the Jump-to icon of the new account and select Go to Tenant

- Click the Dismiss this Warning button
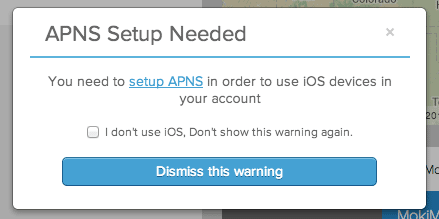
- Click the Dismiss this Warning button
- Follow the process outlined in step 4 of the New Partner Setup article to add the apps and profiles the account will need. If you don’t have this information you can send them instructions to do it themselves
Section 4: Invite Admins to the Account
You are now ready to give the client access to their account and let them start enrolling devices.
- While still in the new account click on the account name in the top right and select Account Settings

- While still in the new account click on the account name in the top right and select Account Settings
- Click the third image down on the left hand side, the one with the man in a tie

- Click the third image down on the left hand side, the one with the man in a tie
- Click the Invite Admin button found on the right side of the screen

- Click the Invite Admin button found on the right side of the screen
- Input their name, email and support role. See here for support role definitions
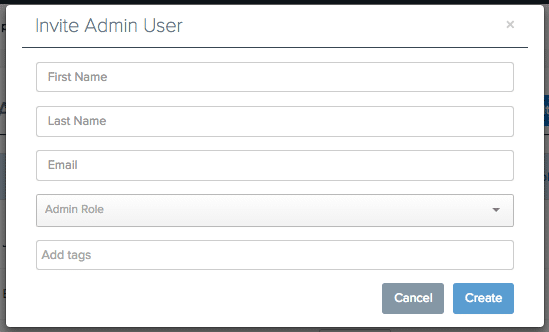
- Input their name, email and support role. See here for support role definitions
- Skip tags for now since there aren’t any
- Click Invite
- Once they accept their invitation and login, their names will show up in the administrator list
They will need to accept this invitation from an email that is associated with a Google account, just like you did to accept your invitation.
Section 5: Getting Back to the Partner Portal
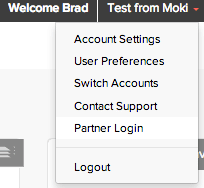
There are two ways to get back, you can change the url back to mokimanage.com/partners, or, you can click on your account name in the top right and select Partner Login.
Choose your next step
From here we’ll let you make the decision whether you’re ready to start enrolling devices or if you want to understand how to manage accounts in the Partner Portal.
