Before you can enroll a device, you will need to create and configure an Android Policy that will be applied to a device once it enrolls. Learn how to create a Policy here. Learn about all the different Policy configuration options, here. In addition, if you would like to install and manage third-party applications, either from the Google Play Store or Private Apps that you upload, you will need to configure those before you add them to a new policy. In the enrollment example below, we’ll assume that a policy has already been created, that apps have been assigned via the “Apps” tab, and that these apps have been added to your policy settings and configured appropriately.
ENROLL DEVICES
QR CODE ENROLLMENT
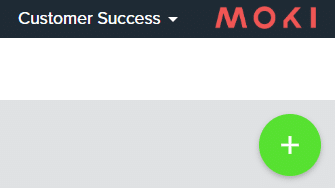
- Once you are logged in to your account, select the “Devices” tab.

- Once there, select the “+ Enroll Device” button towards the upper right-hand side of the “Devices” tab
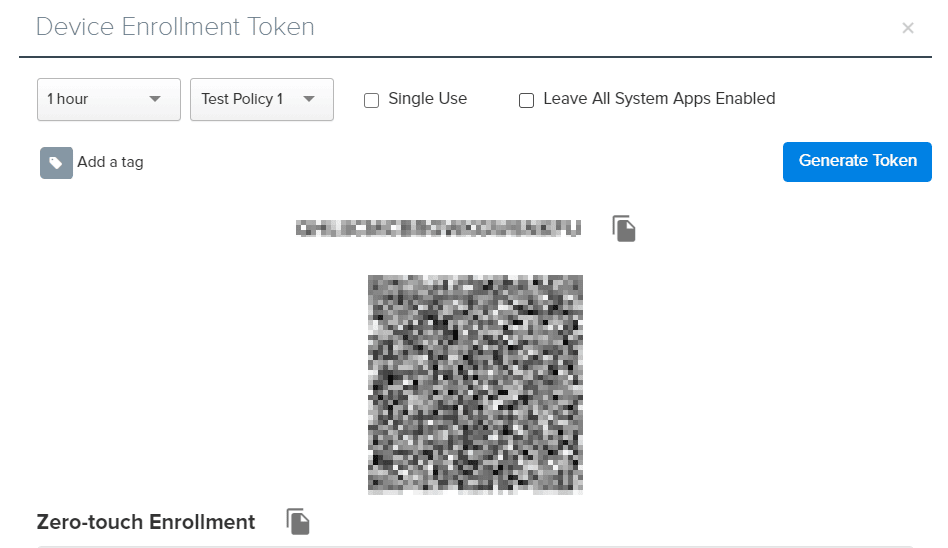
- On the “Device Enrollment Token” page, select:
- The duration of the token
- The policy that you would like to apply
- Select if Personal Usage is Allowed
- Disallowed is the default. If set to Allowed, users can use the token to enroll a Work Profile device.
- If the enrollment is a single-use enrollment or not
- Check Use Mobile Data if Mobile Data will be used to enroll the device
- If you would like to have all System Apps left on the device or not
- Optionally you can configure Language, Time Zone, and WiFi
- If you wish to skip Encryption (done on some Android devices), check the box to Skip Encryption
- Select any Tags you would like to have applied with that QR Code enrollment. Be sure to select all desired Tags prior to generating the Token. You can also create a Tag and apply it directly here.
- Select “Generate Token.”
- You will now see a QR Code and an Enrollment Code.
- You also have the option to email the Enrollment Token for easily saving and sharing

- You also have the option to email the Enrollment Token for easily saving and sharing


Now, on your Android Device, you will need to do the following (all devices will need to be on the initial start-up page that says, “Welcome.” If a device has been previously configured, it will need to be factory reset):
- Physically click the screen six times until you see the “QR Code Setup” option
page. - Select “Next.”
- The device will need to be connected to the internet; it will then check for updates, install a QR reader application (if needed), etc.
- Once the device finishes updating, the camera will turn on, and you will be prompted to scan the QR code that you generated in Moki. Please do so now.
- Once the QR code has been scanned, go through the registration prompts to finalize the enrollment process. Note: it may take a few minutes for the device to update, install an updated version of Google Play services, download, and update apps, apply policies, etc.
- Once your device either shows your desktop or opens to your selected application (depending on policy settings), you are done, and your device has successfully been enrolled to Moki. You should now see your device listed on the “Devices” tab in your Moki account.
DPC IDENTIFIER ENROLLMENT
With Moki, customers do not need to install an Android Enterprise management application from the Google Play Store as the provisioning process is now handled 100% by Google.
- Once you are logged in to your Moki account, select the “Devices” tab.
- Once there, select the “+ Enroll Device” button towards the upper right-hand side of the “Devices” tab.

- On the “Device Enrollment Token” page, select:
- The duration of the token
- The policy that you would like to apply
- If the enrollment is a single-use enrollment or not
- If you would like to have all System Apps left on the device or not
- Select any Tags you would like to have applied with that QR Code enrollment. Be sure to select all desired Tags prior to generating the Token. You can also create a Tag and apply it directly here.
- Select “Generate Token.”On the “Device Enrollment Token” page, select:
- You will now see a QR Code and an Enrollment Code.


Now, on your Android Device, you will need to do the following (all devices will need to be on the initial start-up page that says, “Welcome.” If a device has been previously configured, it will need to be factory reset):
- Follow the setup wizard process.
- Enter Wi-Fi login details to connect the device to the internet.
- When prompted to sign in on the Google Account page, enter afw#setup, which downloads Android Device Policy.
- Manually enter the enrollment code that you generated in Moki.
- Once the enrollment code has been entered, go through the registration prompts to finalize the enrollment process. Note: it may take a few minutes for the device to update, install an updated version of Google Play services, download, and update apps, apply policies, etc.
- Once your device either shows your desktop or opens to your selected application (depending on policy settings), you are done, and your device has successfully been enrolled to Moki. You should now see your device listed on the “Devices” tab in your Moki account.
