When managing devices all over the world it is likely you will need to install an app, profile, app settings or other action to a device or group of devices after business hours. Moki allows you to schedule these kinds of actions ahead of time. There are device actions and app actions and each one happens in a different place inside Moki. Below we’ll explain how to create each of these scheduled actions.
Section 1: Scheduling device actions
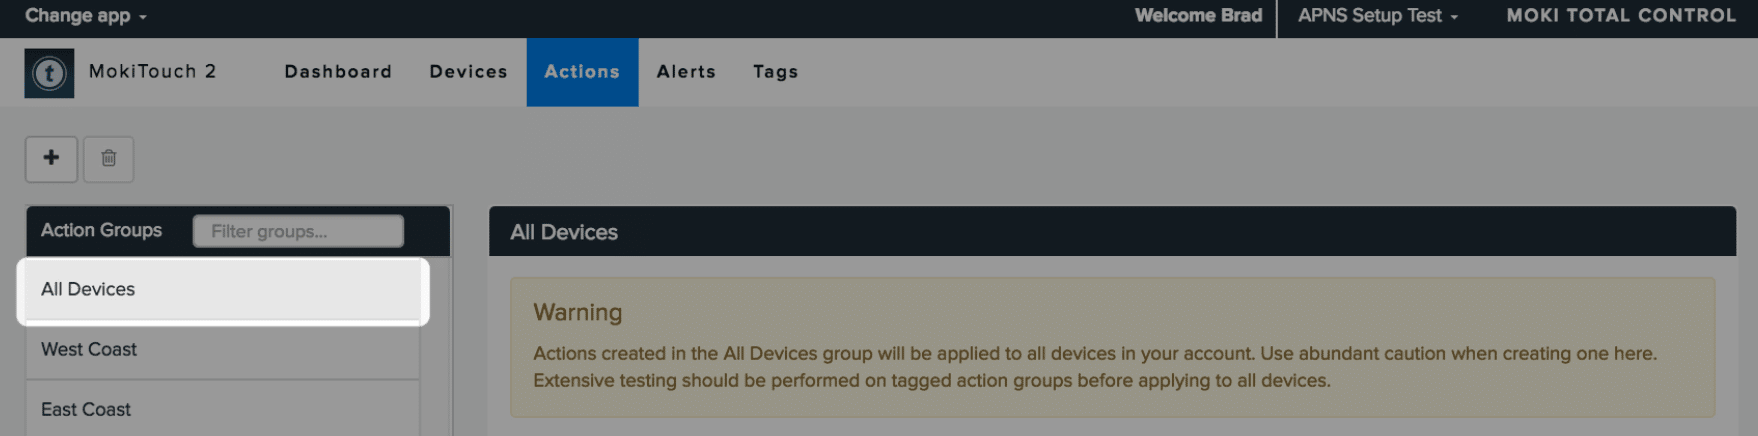
- Click on the Actions tab in the top navigation

- Click on the Actions tab in the top navigation

- Select the All Devices label or your desired Action Group (see How to Create an Action Group)

- Select the All Devices label or your desired Action Group (see How to Create an Action Group)

- Click the Create Action Sequence button

- Click the Create Action Sequence button

- Give the sequence a name and fill in the time, time zone and frequency of for the action sequence
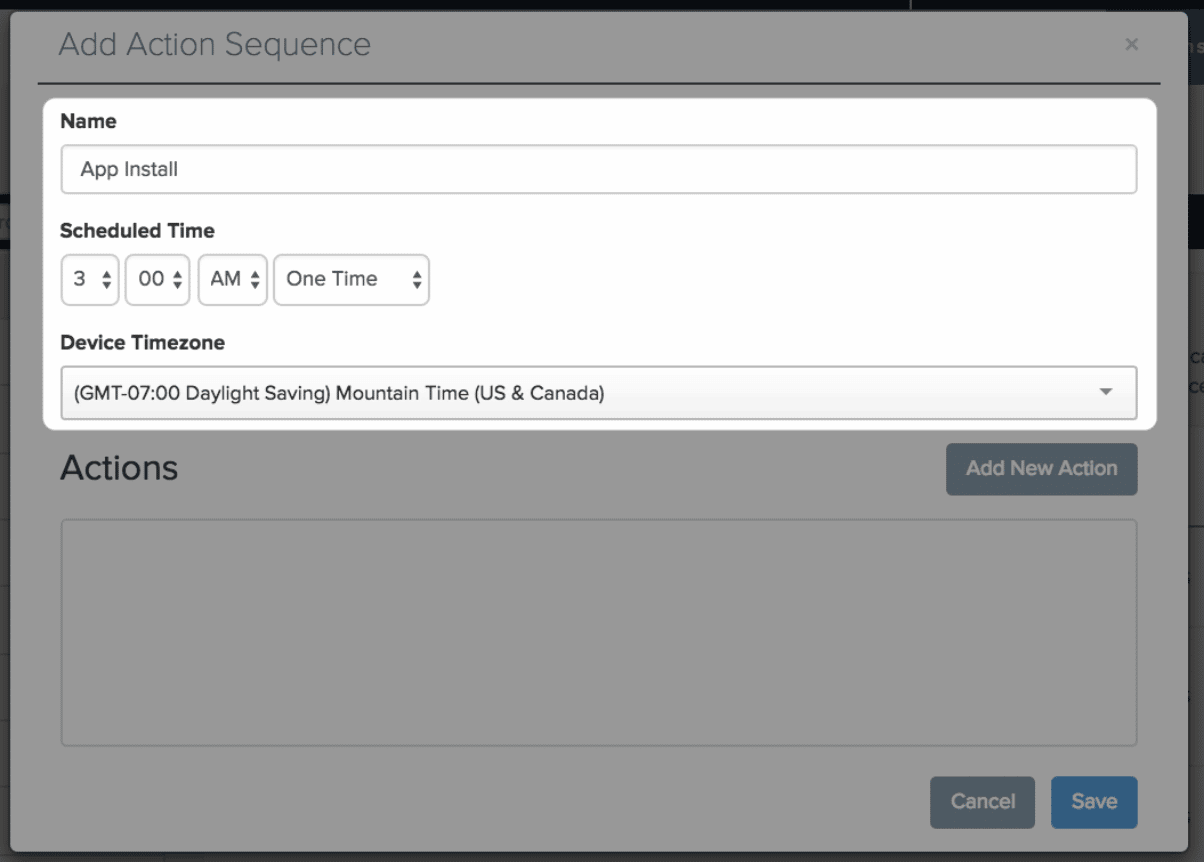
- Give the sequence a name and fill in the time, time zone and frequency of for the action sequence
- Click the Add New Action button and from the drop down menu on the left, select the action you want to perform, then select the specific app or profile

- Available actions include
- Lock – Takes the device to the lock screen
- Install Profile – Installs iOS profiles
- Remove Profile – Removes an iOS profile
- Install iOS App – Select from the iOS app listed in the Apps tab
- Remove App – Removes a managed app from the device
- Refresh – Returns device information back to Moki
- Reset Password – Clears the password if one is set, forcing them to set a new one
- Available actions include
- Click the Save button or click the Add New Action button to add multiple actions to fire in successive order, such as Remove app then Install app or Remove Profile then Install App, etc.
- The actions fire in the order listed and but only move on if the current action completes. You can change the order of the actions by dragging and dropping the action
- Click Save
- These actions can also be edited by clicking the Edit button next to the Action Sequence. They can also be turned Off or Deleted


Section 2: Scheduling app actions
Scheduling app actions requires that you are running an app that meets the following requirements
- Be using MokiTouch 2 or another app that has the MokiManageSDK embedded
- There must already have been a settings template created in order to send settings. For help in creating a settings template see the article Creating and Using Templates.
- To change settings on specific devices instead of all devices you must have a tag on them which is associated with an Action Group. (See these articles on How to Tag Devices and How to Create an Action Group)
Steps to schedule app actions
- In Manager, click Change App in the top left and select the app you want to schedule the settings change for

- In Manager, click Change App in the top left and select the app you want to schedule the settings change for

- Click the Actions tab

- Click the Actions tab

- Click the All Devices label or your desired Action Group
- Click the All Devices label or your desired Action Group

- Click the Add New Sequence button and give it a name

- Click the Add New Sequence button and give it a name

- Give the sequence a name and fill in the time, time zone and frequency of for the action sequence
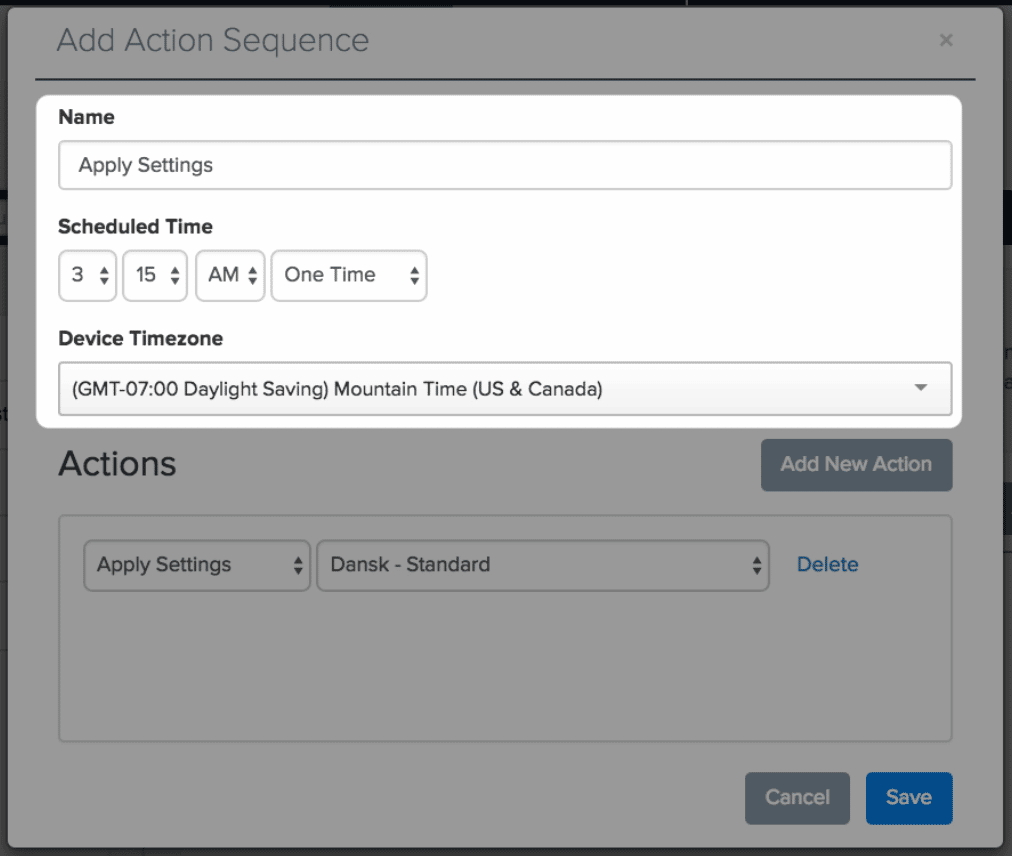
- Give the sequence a name and fill in the time, time zone and frequency of for the action sequence
- Click the Add New Action button and from the drop down menu on the left, select the action you want to perform. For applying settings, select the Saved Settings you have created

- Available actions include:
- Apply Settings – Apply a Saved Setting or Template that you have created
- Get Device Location – Get the location of the device
- Get Logs – Retrieve the last logs captured on the device
- Take Screenshot – Take a screenshot of the device’s screen
- Available actions include:
- Click the Add New Action button and from the drop down menu on the left, select the action you want to perform. For applying settings, select the Saved Settings you have created

- Click Save
- These actions can also be edited by clicking the Edit button next to the Action Sequence. They can also be turned Off or Deleted


